Panel Frame Instructions
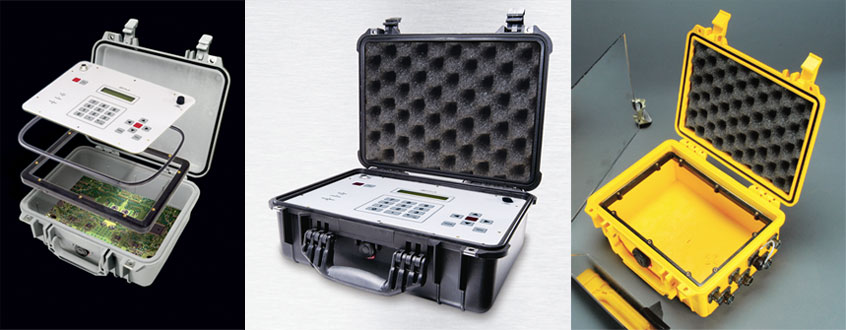
Panel frames give you the ability to attach an electronics interface panel flush with the rim of a Peli Protector case. This enables the depth of the case's lid to be used for any switches, buttons, connectors and ports that stand up from the panel face. (Buy Peli Panel Frames)

(Note: The following refers to Peli Protector Cases. For mounting electronics in Storm Cases you will need to buy a bezel it instead, which are installed slightly differently.)
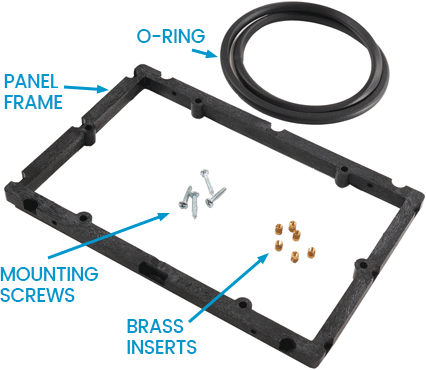
A Panel Frame Kit for a Peli Case will typically include the following:
- Panel Frame
- Brass Inserts
- 6-32 x 1/4 Thread (M3.5 x 6.3mm)
- 4-40 x 1/4 Thread (M3 x 6.3mm)
- (1120, 1150 only)
- Mounting Screws
- O-Ring (Panel Seal)
- Instruction Sheet

How to install a Panel Frame into a Peli Case
- Ensure that the frame is correctly oriented prior to installation. Check for the model identifier and the word 'front' (e.g. '1450 front'). The panel frame will need to be installed with these characters closest to the front of the case. (If the frame is installed in reverse, the mounting screws will protrude through the case as they are oriented to match the external ribs).
- To install the brass inserts, place the frame face down (so the model identifier is facing down). Place the non-shoulder small end of the insert into the hole and push it in with a Phillips screwdriver until it's fully seated on the shoulder.
- To secure the frame to the case, insert the frame into the case until it's fully seated on the internal ribs. Next, insert a mounting screw (supplied with the kit) into the hole and press the screw firmly as you turn the screwdriver to start self-tapping. Continue to turn until fully seated or use a 90° drill motor.
- Install the o-ring into the channel between the frame and the case. The o-ring must be fully seated.
- Install your custom panel. Your panel should completely cover the o-ring for maximum fluid and dust resistance. Install the screws (into brass inserts) by hand, and DO NOT APPLY PRESSURE. The fit of the insert to the frame was designed for easy installation by hand, without specialised tools. Excess pressure risks pushing the brass inserts back out the other side.
More information?
Choose a Peli Panel Frame or call us on 01275 866 366 Mon-Fri for advice. We can also provide a free no-obligation quote for a custom case solution.
